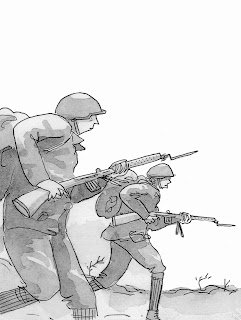
In the first session of Photoshop inductions, we were taught how to use the program to enhance scanned images and restore them to how they looked on paper.
Task 1

We started off with the scan above and opened it up into Photoshop. To clean up any dust and marks that weren't supposed to be there, we used the spot healing tool. Then we used the crop tool to straighten the image out and get rid of any unnecessary space around the edges. To make the blacks more prominent we used the levels tool and adjusted appropriately. To make sure the background was really white we used tools such as the magic wand tool to select the colours and then the brush tool to go over any marks left over.
Task 2

The next task was to restore this image from the photograph. Immediately you can see that the images perspective is wrong, there is a pen in the way and it has been taken with bad lighting.
To start the process I used the patch tool to get rid of the pen. I then used the transform > perspective tool to straighten out the edges. However, this made the image look squished to I simply stretched the top until it looked right. Next I cropped out the unnecessary surroundings so it was just the image on screen. Whilst doing this, I made sure to keep the image size at A4 so it would be suitable for printing. As the lighting was bad in the photograph, the levels needed adjusting so the colours weren't too dull. I made the blacks darker and adjusted the white accordingly.
Although I have quite a lot of experience using photoshop, this was always an area I wasn't too good at so I found this session really useful.


No comments:
Post a Comment